DIY 006 || Modern Chevron Headboard
Watch Cori and Sam from Stay help you #LoveTheRoom with this DIY Modern inspired headboard build. This one turned out amazing and was fairly easy!!!
ITEM LIST & PROJECT DETAILS
Tools
Paint Roller
Miter Saw
Nail Gun
Hammer
Sander
Materials
10 - 1 x 6 x 8’ Board
2 - 1 x 2 x 8’ Board
60” X 30” Plywood
Wood Glue
1-1/4” Brad Nails
100 & 220 Grit Sand Paper
Wood Filler
Black Paint and/or Stain
Difficulty
Fairly Easy
Cost
Low
INSTRUCTIONS
Always wear safety gear, read the manufacturer's labels and use caution when performing an install. Instructions are for a Queen size bed. Adjust the measurements based on the needs of your bed size.

STEP 1
Get a full sheet of plywood cut down to measure 60”x30” at Lowe’s. Stain the plywood with Minwax True Black Stain. After the stain dries, find the center of the piece of plywood and make a line straight down the middle. This is your point of reference you will build the piece off of.
Also prep your 1x6’s by staining the thin sides of both boards with the True Black Stain. That’s so when its put together you don’t see any raw, exposed wood.

STEP 2
Set your miter saw to 22.5 degree and make the first cut from the end of the 1x6. Place the cut end of board on the middle line of the plywood backer. Make a line where the board meets the edge of the plywood. This will give you the length of where you need to cut it

STEP 3
Rinse and repeat until you fill out the headboard with all of your pieces to create the chevron pattern prior to assembly.
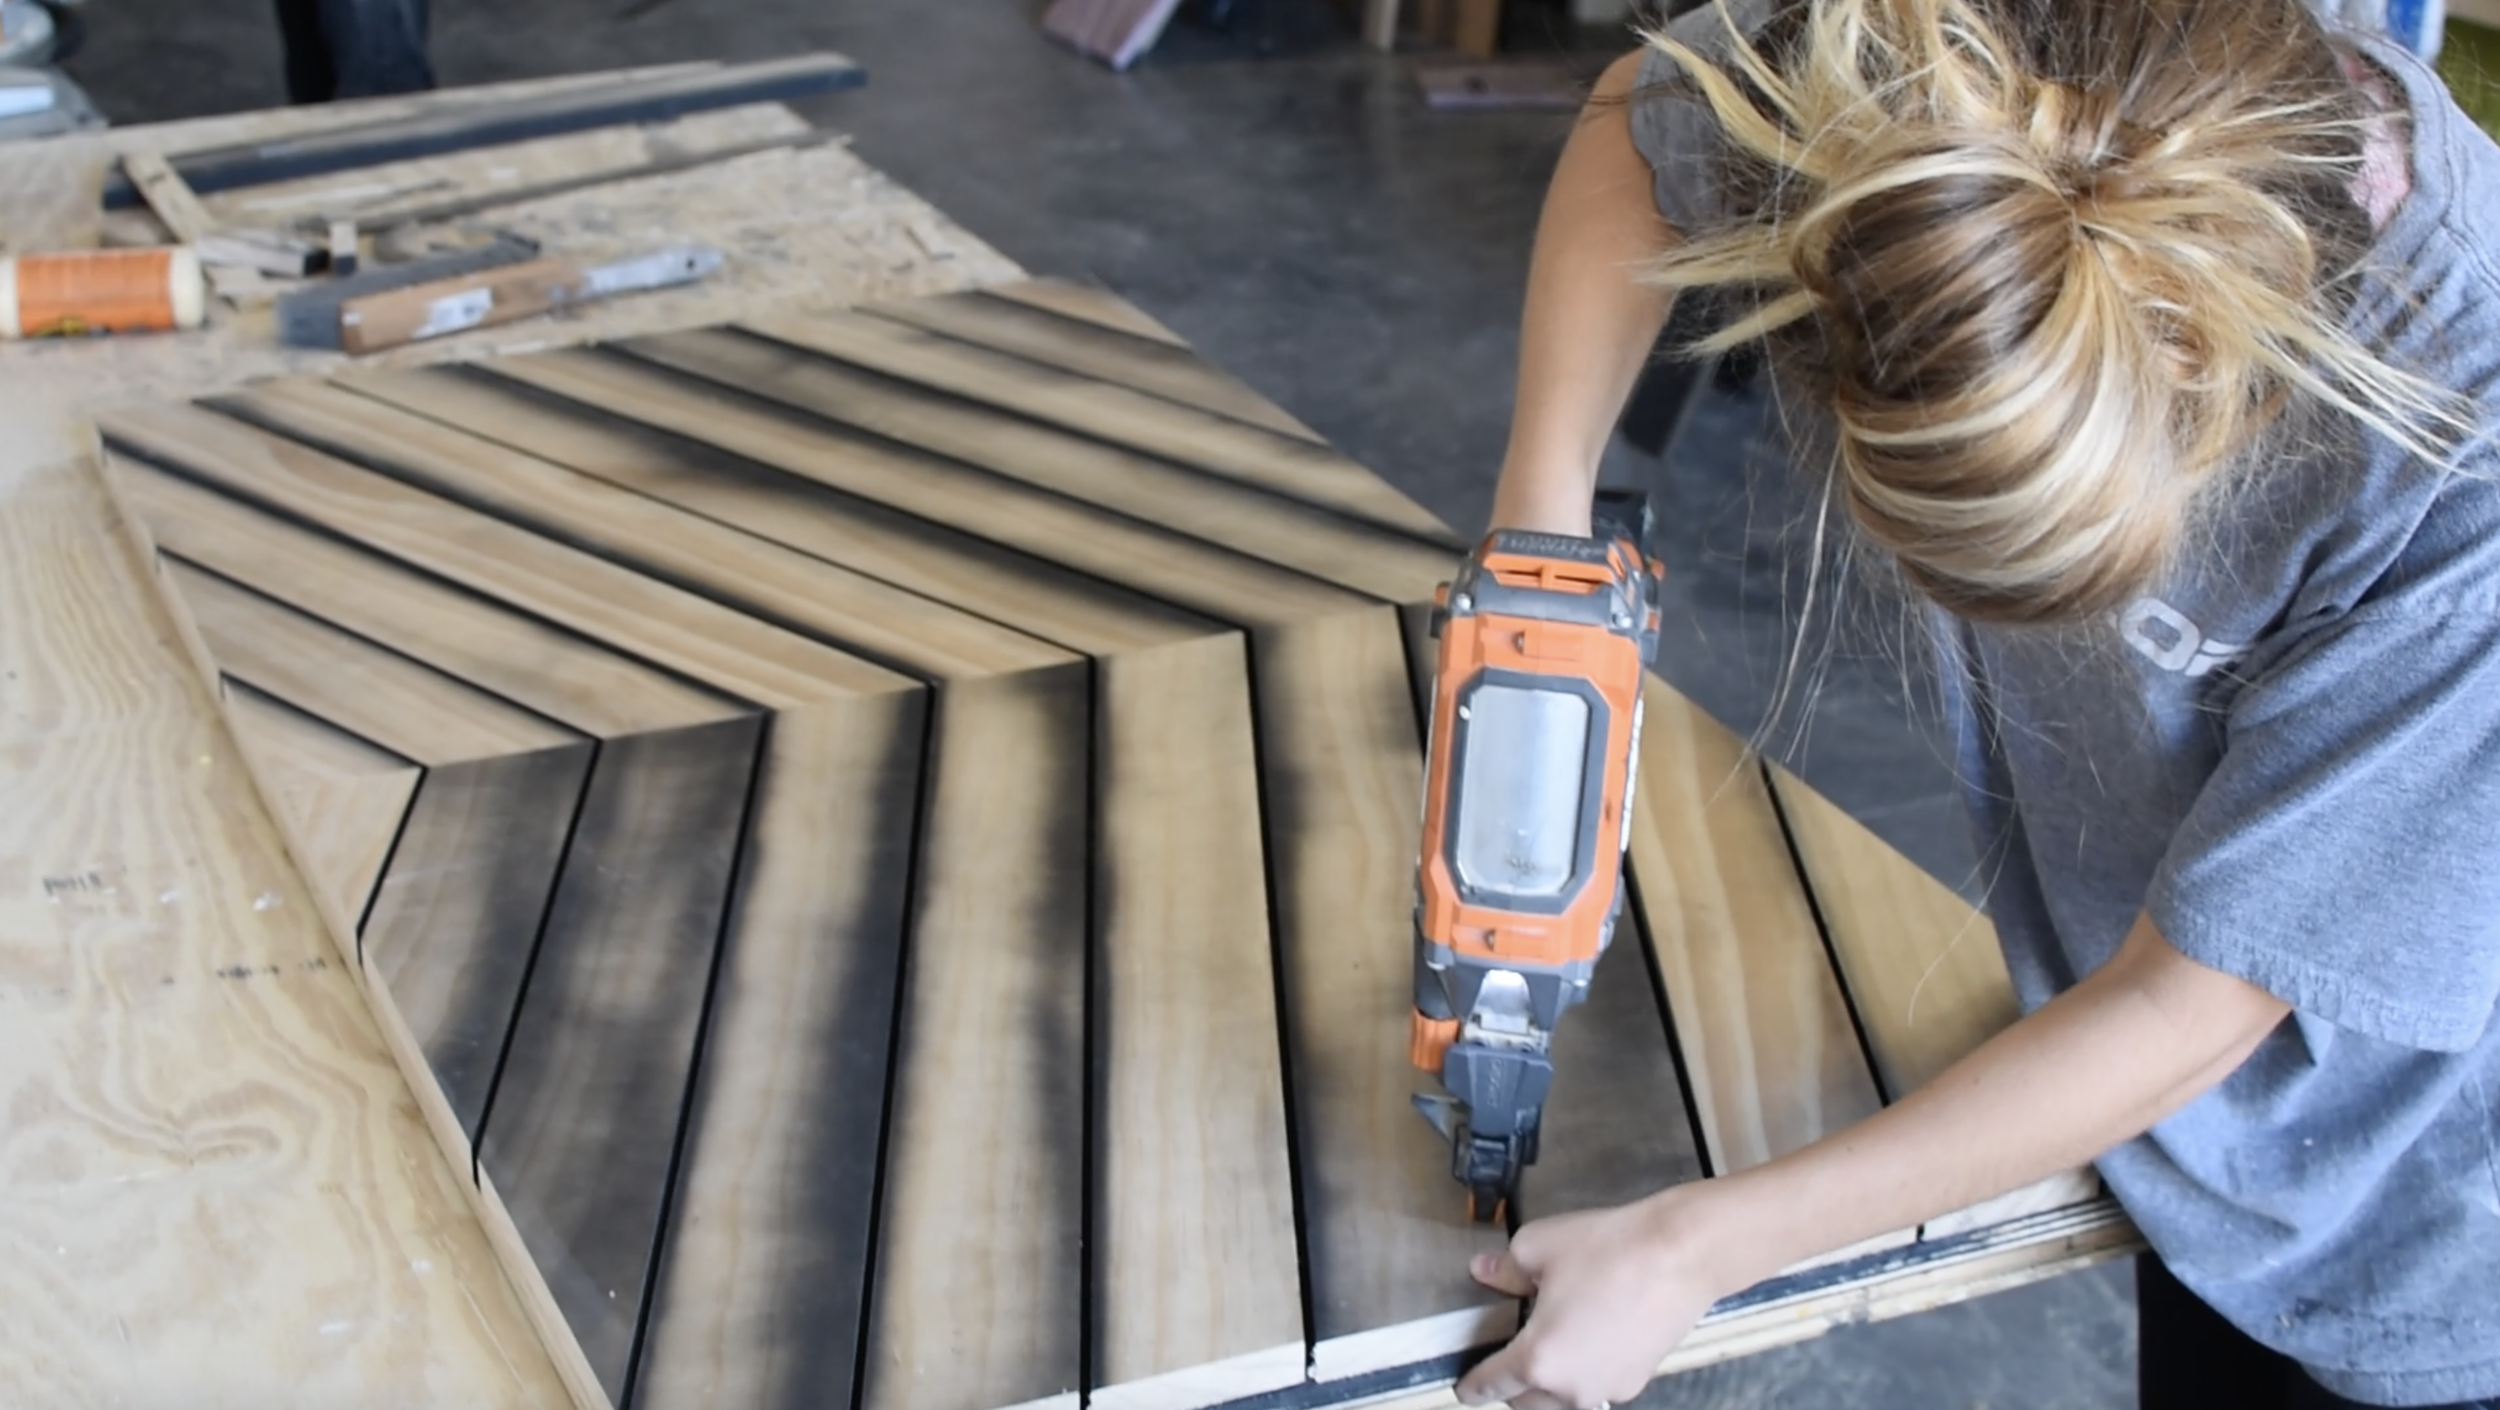
STEP 4
Starting at the bottom triangle piece, glue the bottom of each board, then nail using the 1-1/4” brad nails. Line up the next board to the middle line then use a scrap piece of 1/4” wood or a a paint stirrer to create the spacing in between each board. The spacing can be as wide or as tight as you’d like it to be. Once all the boards are nailed down go back over with a hammer to make sure no nails are sticking up.
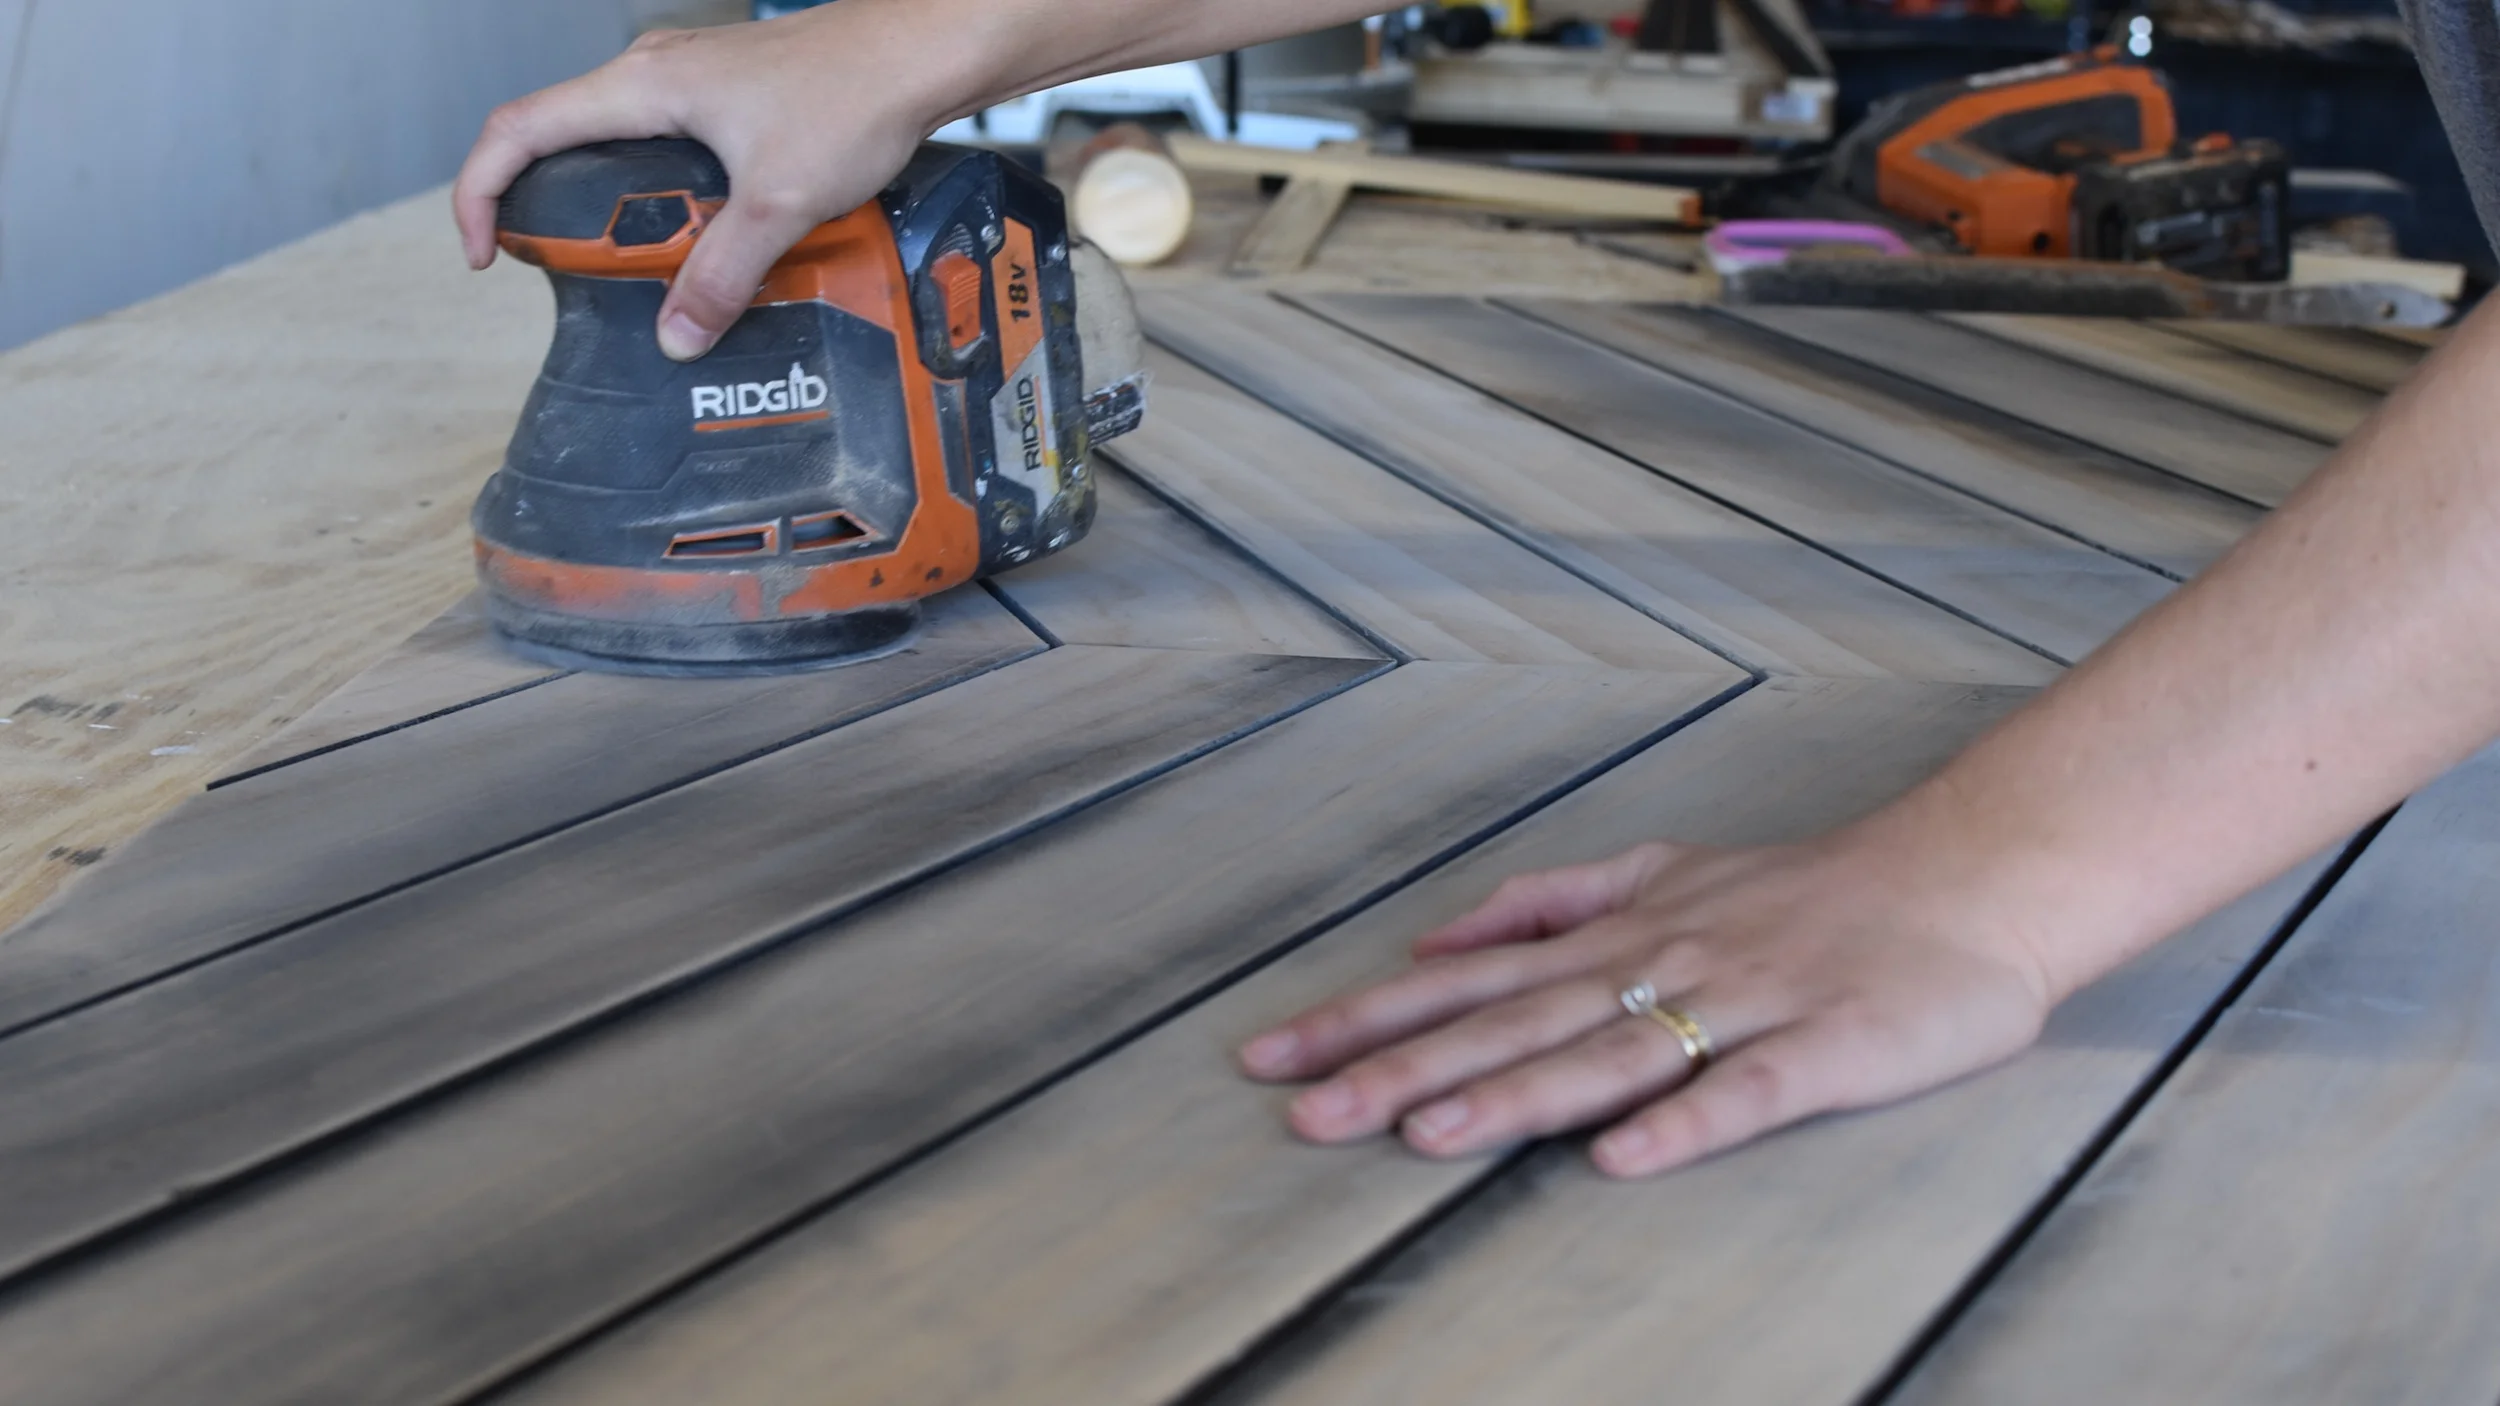
STEP 5
Sand with 100 grit sand paper to get everything flat and smooth. We went to a 220 grit sand paper afterwards to make it a little smoother to the touch.

STEP 6
Once you’re finished sanding start filling in the nail holes (if you want to cover them) with the wood filler.

STEP 7
Scrape the excess filler off and out of the cracks.

STEP 8
While that’s drying, cut and stain the borders. Border angles were 45 degree angle cuts to create a nice finished look.
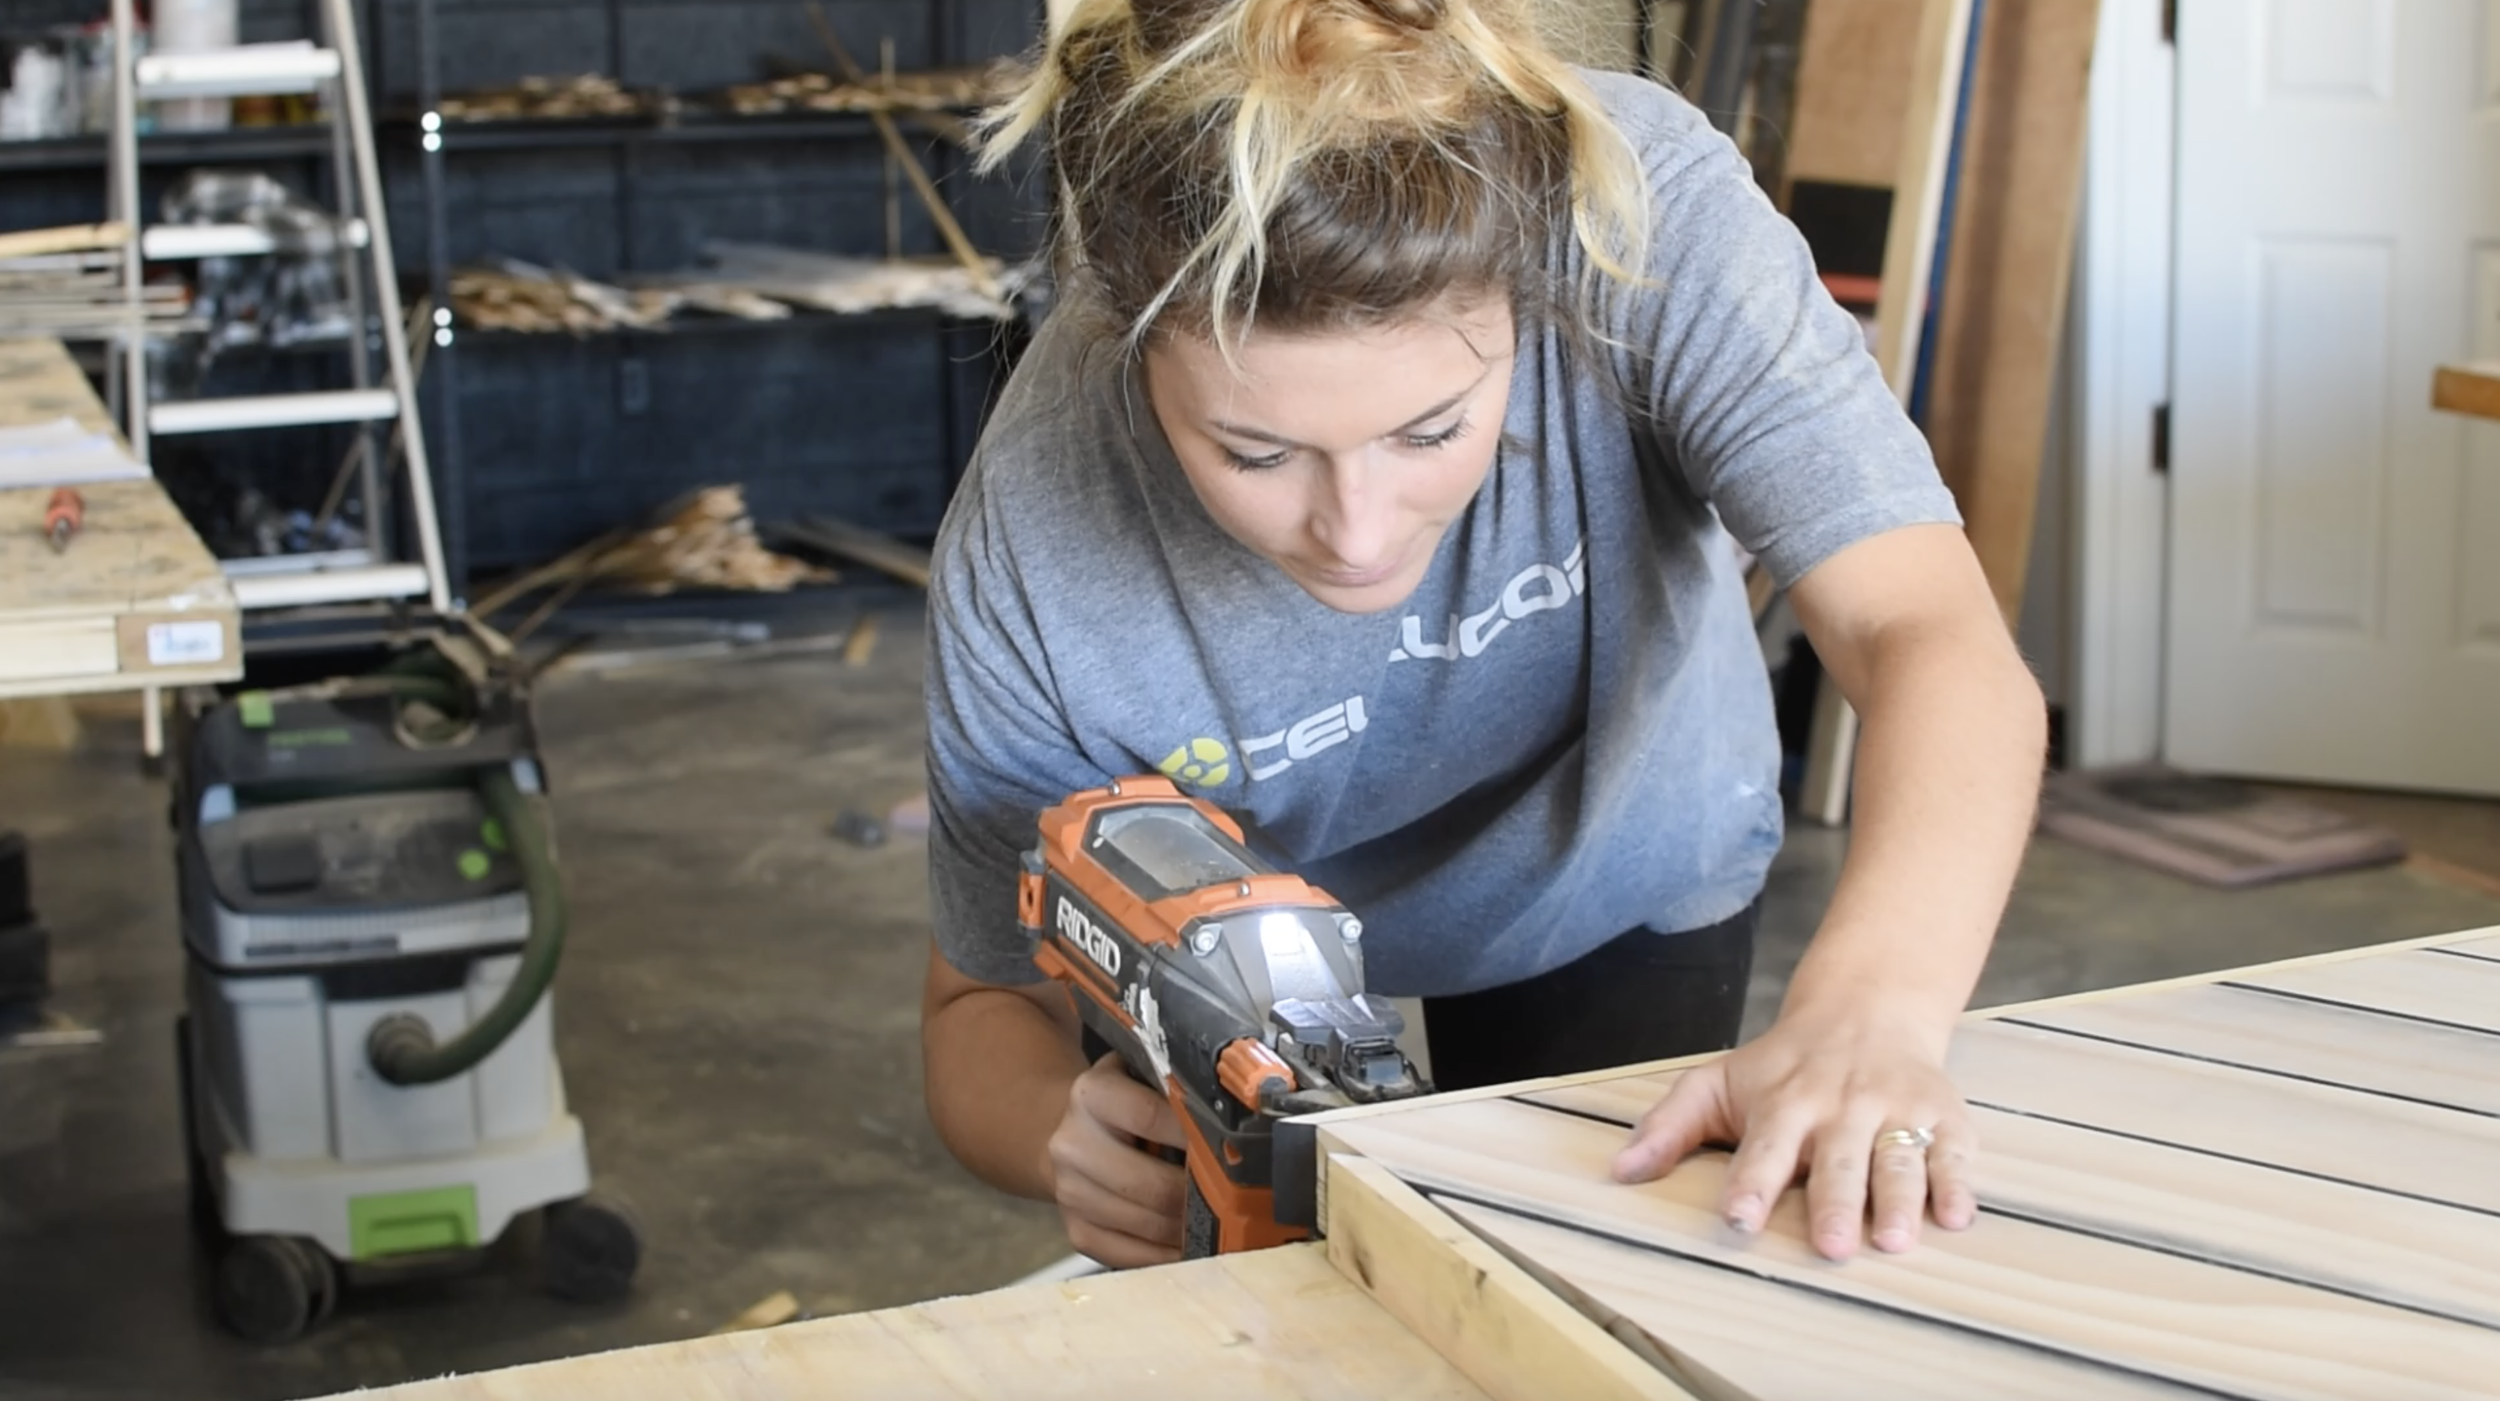
STEP 9
Glue in between the cracks so the glue doesn’t seep through, then use the same 1-1/4”.

STEP 10
Sand one last time with the 220 grit to make sure the border is flush the the rest of the headboard.

STEP 11
Paint using Black Paint or the color of your choice. Roll it on with a small 4” roller from Lowe’s. Apply the first coat then let it dry. Wait an hour or two depending on the conditions you’re working in then apply the second coat of paint.

FINISHED
Lastly grab 2 - 2x6’s that will be used for the leg supports. Measure the height of your mattress from the floor, then go up 24” if you’re headboard will be 30”. Fasten the headboard to the 2x6’s. Place your new headboard behind your bed and enjoy!
Designer: Stay by Cori Samuel || Videography/Photography: Sidney Gathers || Product Provided By: Empire Moulding & Millwork